The Ultimate Guide to Landscape Photography Part 2 – Camera Settings
by Alex W.
Note - This is Part 2 of our Ultimate Guide to Landscape Photography series. You can see Part 1 here, where we discuss the gear used for landscape photography and Part 3 here, where we plan a landscape shoot.
Having the right gear for landscape photography is undoubtedly important, but without knowing how to use this gear it's useless. A good photographer with low-end gear will almost always outperform those who have all the gear but no idea .
Things like composition and light are incredibly important in all types of photography, but before we can take use these tools effectively we first need to know how to use our camera.
You Might Like… The Best Landscape Photography Cameras
If you're anything like me you'll have been completely befuddled the day you took your very first camera out of the box. There are buttons, switches, and dials all over the place, all of which are accompanied by unfamiliar acronyms. It's hard to know where to even start, but this guide aims to guide you through the process and towards taking breathtaking landscape images.
Note: This is Part 2 of our Ultimate Guide to Landscape Photography. Part 3 is here and Part 4 is here. Sign up to our newsletter to make sure you don't miss anything!
Contents
Learning to Use Your Camera
I'm not going to recite a camera manual here, it would be pointless and incredibly boring for both of us. Besides, why do that when the camera manufacturer has already slaved away at their own, bespoke manual.
Seriously, read the manual!
It might sound like the last thing you want to do when you've just unpacked a shiny new gadget, but camera manuals are full of useful pieces of information. Sit down with your camera beside you for reference and devour that information. At the very least you'll know what all those acronyms mean by the end, and that will make the learning process much easier going forward.
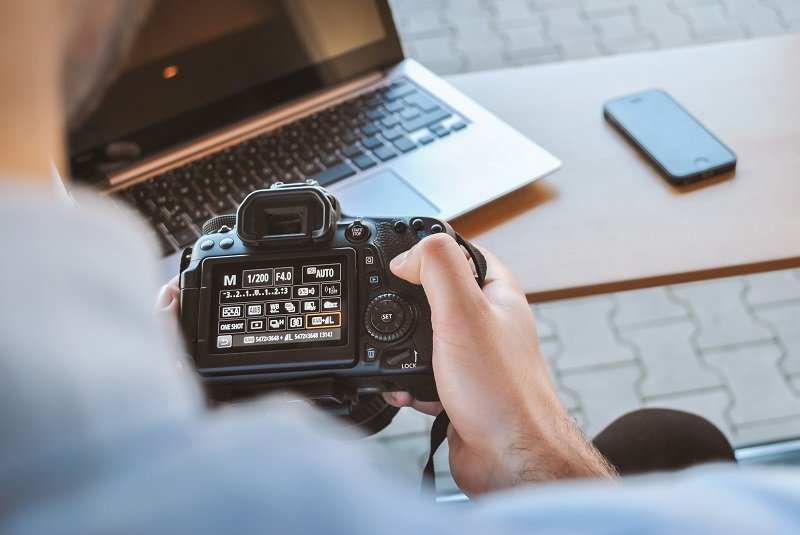
Camera Settings for Landscape Photography
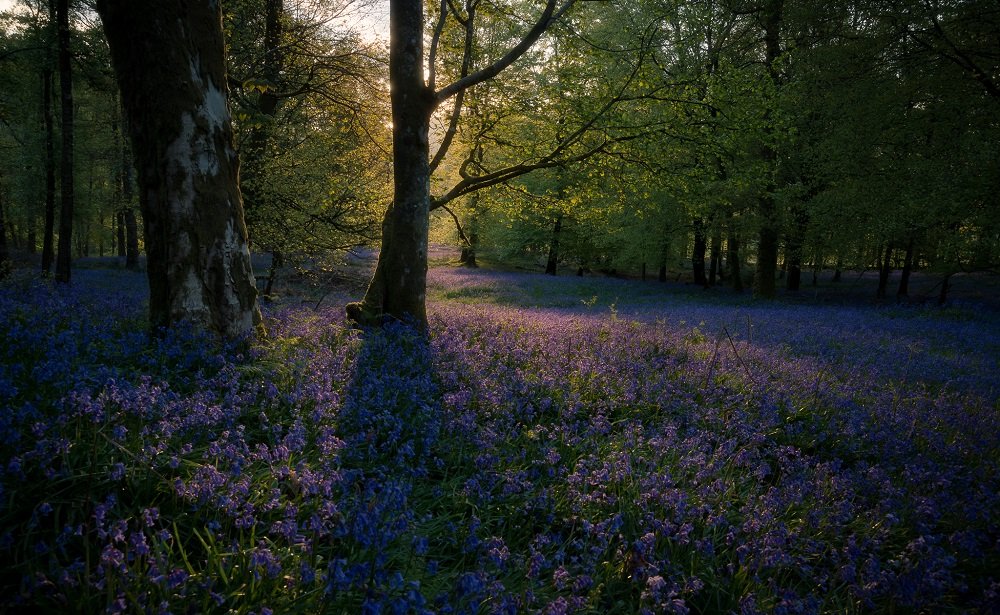
Now that you've read your camera manual and know your way around the multitude of buttons it's time to learn which specific settings we need to think about in landscape photography. There is quite a lot to process, but give this section a few reads and get out practising and it will be second nature for you before you know it.
Preparing Your Camera Settings
Imagine you're stood by your tripod during a glorious sunrise, photograph composed and waiting for that crucial moment of light. That light arrives, but when you press the shutter the autofocus freaks out and starts trying to track the focus on a nearby bird. You sort that issue out, and while you've missed the best of the light you still got something pretty good.
Then you get home and realise you had the Photo Quality setting is set to LOW JPEG instead of RAW, and subsequently have taken a 4 megapixel image instead of a 24 megapixel one. Great… You were planning on hanging that on your wall but now you can only print it 8 inches wide.
This can all be avoided with some simple preparation of your camera settings before you even step out of the door. There are certain settings that you (almost) always want to use for landscape photography, and you can save the headaches and heartaches in the field by remembering to set these beforehand.
Shooting Mode - Manual
Almost all modern cameras come with a little wheel on the top of the camera body to change the shooting mode. They often have an automatic mode, a number of 'scene' modes, and then Aperture Priority, Shutter Priority, and Manual.
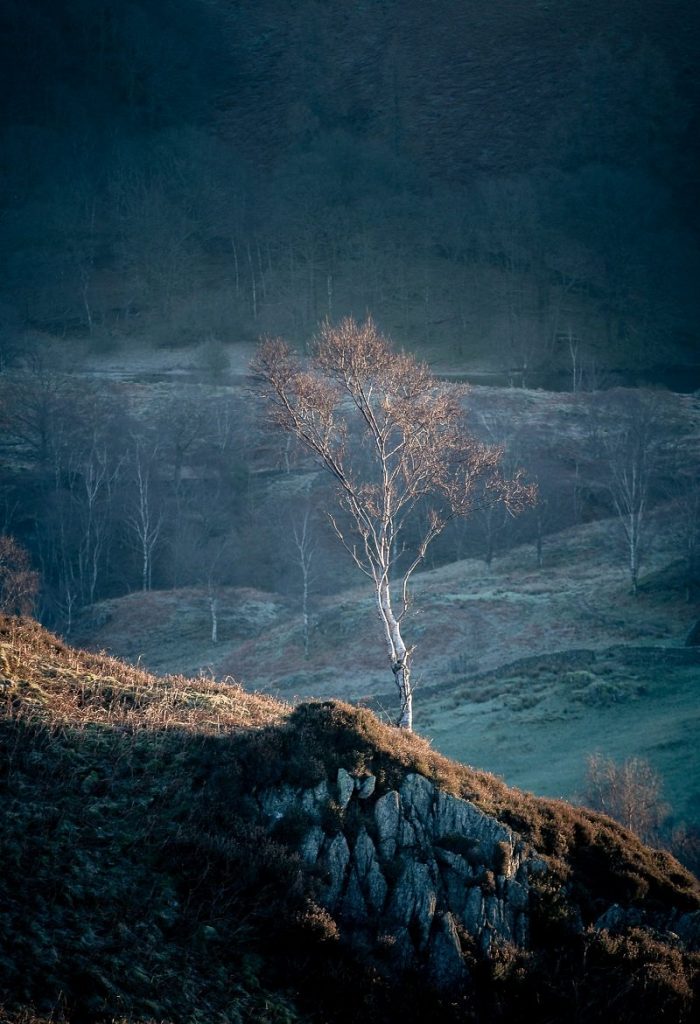
I always recommend shooting in Manual. It's a big step for the newbie photographer to take the camera out of Auto, but I promise you it will speed up the learning process immensely and give you full control over your images.
In Manual mode you have to alter the ISO, Aperture, and Shutter Speed yourself. The full range of benefits are explained in the article above, but the general idea is that it allows you to fine-tune your settings to suit your needs precisely, rather than relying on the in-camera metering system. This makes experimenting with shutter speed, depth of field, and over/under exposure much easier, and while it does steepen the learning curve somewhat it is hugely beneficial in the long run.
Picture Quality - RAW
Most cameras have a number of different picture quality settings to choose from. My Nikon D800, for example, allows me to choose between three JPEG settings (Basic, Normal, and Fine), a RAW only setting, and a RAW+JPEG setting. Why I would want to use a 37 megapixel camera to produce a 'Basic' JPEG is beyond me, but nevertheless I have the option.
For reasons explained in this article I only ever shoot in RAW. These files are much larger than JPEGs, but they contain all of the data that the camera has captured. Subsequently, the files are much more flexible when dealing with very high contrast scenes and also allow a full range of post-processing techniques to be applied if I wish.
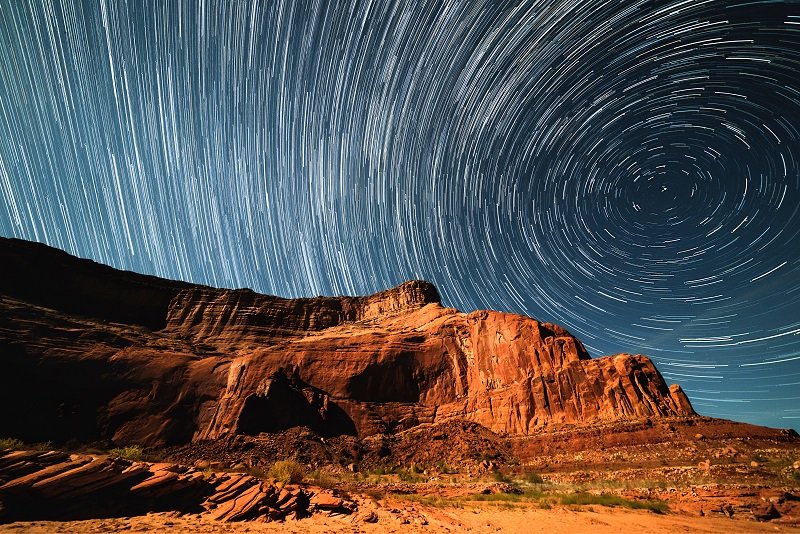
The drawbacks are few and irrelevant in my opinion. RAW files do take up more storage space, but with storage available at record low prices this really isn't an issue. We recommend buying an external HDD for your images anyway. RAW photos also require post-processing to bring the best out of them, but that's something that should be done anyway. JPEG files are 'edited' by the camera's processor to improve sharpness, contrast, and saturation, and personally I'd much rather be in control of the post-processing than my camera.
White Balance - Auto
The white balance refers to the colour temperature of the light in the scene, and it is one setting that I almost completely trust my camera to have control of.
This is because it simply doesn't have any effect when you're shooting in RAW format. Since all the data is captured in RAW files we can fully control the white balance in post processing, whereas with a JPEG file the white balance is 'locked' after compression, and as such has very limited changeability in post-processing.
Another big plus sign for RAW shooting. You can completely stop worrying about an important camera setting and have full control over that setting back in the comfort of your home when you're processing in Lightroom or some other program. Mistakes in white balance are very easily corrected when shooting RAW.
Autofocus - Single Point AF-S/One Shot Autofocus
If I were to guess I'd say that your camera has at least four different focus modes to choose from, and annoyingly each camera manufacturer uses different names for them. This is where that manual reading session comes in handy! Not only that, but you can often change how many focus points your camera uses, which can range from 1 up to over 100.
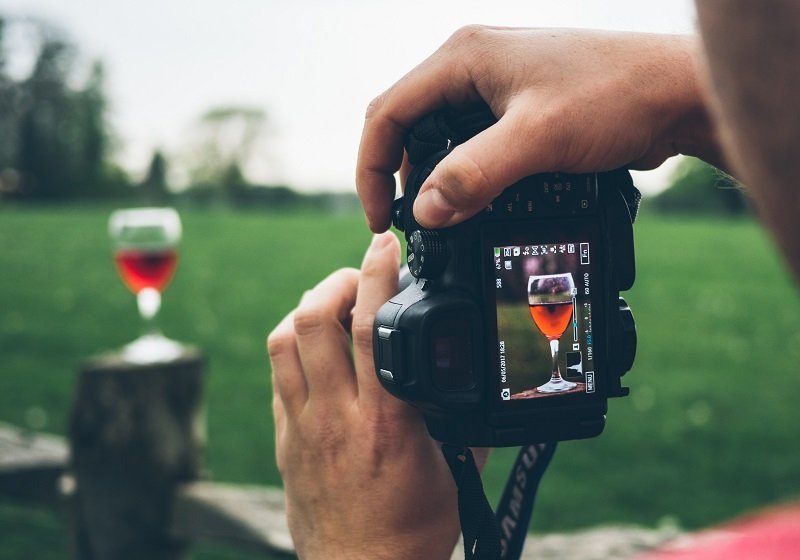
For landscape photography I tend to stick to the most simple method of them all - A single focus point that doesn't continually track the subject while focusing. On Nikon this will be Single Point AF-S, and on Canon it will be deemed Single Point One Shot.
To use single point autofocus all you need to do is use the buttons on the back of your camera to move the focus point around the scene, placing it over the subject you want to focus on and then half pressing the shutter to begin focusing.
The other modes certainly have their uses, but in landscape photography we're often photographing a stationary scene, and for that the most simple method is usually the most failsafe. I'll run through the other focus modes below, just so you can see where they might be useful:
- Continuous Focus - This is called AF-C on Nikon and AI Servo AF on Canon, and is useful when photographing moving subjects. The focus continuously adjusts while the shutter is half pressed, tracking the focus of a moving subject until the shutter is clicked. This can be combined with multiple focus points to help the tracking of unpredictably moving subjects.
- Manual Focus - This can definitely be used in landscape photography, but with autofocus doing such a good job in general it's often unnecessary. Astrophotography is my main use for this mode, where the lack of light causes issues for the autofocus system. It's also useful in macro photography due to the extremely limited depth of field and importance of very precise focusing.
Where to Focus in a Scene
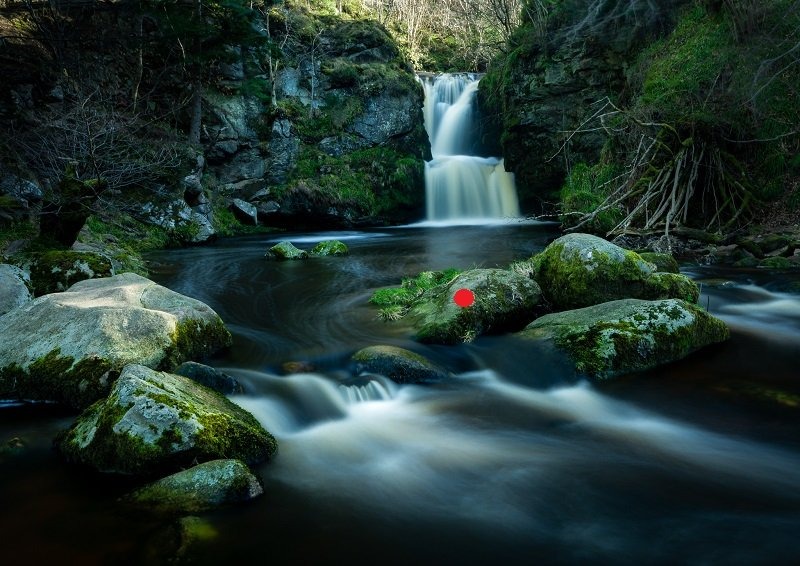
For this image I needed a substantial depth of field, so my focus point was placed where the red dot is, which is about 1/3 of the way into the scene. This roughly translates to the hyperfocal distance, and as a result I ended up with front to back sharpness.
Now that you know which mode to select when preparing for a landscape shoot it's important to know where you should place that single focus point. This affects the final depth of field attained in your image, and we often want everything in our scene to be sharp and in-focus. As a rule of thumb, I tend to focus on one of two things:
- The Main Point of Interest - This is the first thing the viewer's eye will be drawn to, and it's important that it's as sharp as possible. This is usually whatever foreground subject I've chosen to use.
- 1/3 of the Way into the Scene - When I have multiple foreground subjects that I want to keep as sharp as possible I tend to focus about 1/3 of the way into the scene. This is a very basic calculation of the hyperfocal distance (discussed below) simply because it is often more than good enough and ensures that I'm not doing maths in the field.
A Word on Hyperfocal Distance
As mentioned above there is an actual mathematical formula for determining the best distance at which to focus to ensure sharpness throughout your scene. This can be useful in very demanding situations, but when shooting at a fairly narrow aperture I find the 1/3 rule works more than well enough.
Hyperfocal distance is defined as the closest distance at which a lens can be focused while keeping objects at infinity acceptably sharp. When the lens is focused at this distance, all objects at distances from half the hyperfocal distance to infinity will be acceptably sharp.
Now you see why I prefer the rule of thumb right? Honestly though, it's not as complicated as it sounds, and you can download hyperfocal distance charts and get apps on your smartphone to calculate it.
We'll use an example from the handy table above, brought to you by the excellent app PhotoPills. Lets say we're using a Nikon D800 with our lens set to a focal length of 18mm and a typical landscape photography aperture of f/11. Using the table above we can see that the hyperfocal distance is 0.97 metres, so if we focus our lens at that distance everything from 0.485 metres (half the hyperfocal distance) to infinity will be acceptably sharp.
Metering Mode
If you're shooting in Manual mode this isn't quite as important, but even in manual there is a little display on your camera to tell you whether your current settings will produce an under exposed, over exposed, or correctly exposed image. This is calculated via the metering mode.
As always, there are a number of settings to choose from; usually a spot metering mode, a centre weighted metering mode, or an average metering mode. These all have their uses, but for landscape photography I tend to leave it in the average metering mode.
What this does it evaluates every part of the scene and calculates the correct exposure based on the average amount of light in the scene. It can cause some problems in high contrast scenes, but in Manual mode this is easily corrected and it's generally the most accurate method of metering for landscape photography.
Camera Settings in the Landscape
Now that you've got your camera prepared for a landscape shoot a lot of the tedious work is done. You shouldn't forget about these pre-prepared settings, but more often than not they will be the best option and you don't have to worry about fiddling around to change them during the decisive moment of light.
This leaves us free to focus on the settings that do need to be changed out in the field. The main ones are Shutter Speed, Aperture, and ISO, which together are known as The Exposure Triangle.
If you haven't read the above article and don't understand the Exposure Triangle I would highly recommend getting to grips with it, otherwise the section below may confuse you a bit. We'll start with the most simple setting - ISO. But first, a word on the histogram:
Using the Histogram in Landscape Photography
The histogram - It sounds complicated, it looks complicated, but it's really not that complicated. Instead, what it is is an incredibly useful tool to use to check your exposure out in the field, and it's much more accurate than just reviewing the image on your LCD screen.
Despite it's scarily technological sounding name and appearance, histograms are actually very easy to use. All it is is a representation of the image in graph form, with the x-axis running from pure black to pure white and the y-axis charting the number of pixels in each area. If there's a big peak towards the right hand side of the histogram, the image it's representing has a lot of bright pixels.
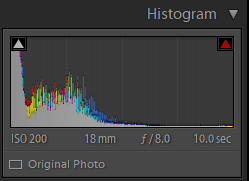
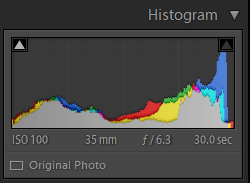
How is this useful to us? Well, it offers up a more accurate method of determining whether our image is underexposed, correctly exposed, or overexposed. To make matters even more straightforward, all we need to take notice of is the far left and the far right of the histogram.
These areas represent pure black and pure white, neither of which we want in our image. The areas of the image that are pure black or white contain no detail, which means they have no data in them. These areas are referred to as 'clipped' parts, with pure blacks being clipped shadows and pure white being clipped highlights. We want to avoid this as often as possible.
If there is a big peak that cuts off on either side of the histogram we need to take measures to adjust our exposure. As an additional note, clipped shadows are generally more forgiving than clipped highlights. In most cases, if the highlights are blown out the image is ruined.
ISO - Keep It Low
You should be using a tripod a lot of the time in landscape photography, and doing so will allow you to almost set and forget the ISO.
As explained in the Exposure Triangle article, the ISO refers to your camera sensor's sensitivity to light. A higher ISO means your sensor is more sensitive to light, and therefore you will need a faster shutter speed or narrower aperture to maintain the same level of exposure.
However, the drawback of making your sensor more sensitive to light is that it starts to introduce noise. Noise is the graininess of an image, and generally speaking it's not something we want in a landscape photograph.
For this reason I always opt for the lowest ISO I can in landscape photography. When using a tripod this typically means using the base ISO of 100, which results in lowest amount of noise and highest image quality possible.
Just remember - If you're using a tripod you can just set ISO to 100 and leave it there. That's one point of the Exposure Triangle dealt with.
Don't be Afraid to Increase ISO
Yes, this may go against the main point of this section, but it's important to remember that we can change the ISO without completely ruining our image.
The below images were taken in quick succession, with ISO settings between the base ISO 100 and the high ISO 12800. None have had any form of noise reduction performed on them Shockingly, on a small scale, you are hard pushed to tell the difference between these images, with the only noticeable decline in quality being the lack of contrast at ISO 12800.
The difference does get more evident as you zoom into the image or try to enlarge it, but it's still more than acceptable up to ISO 2500. This increase in ISO allows your shutter speed to increase from 1/30 second (in the ISO-100 image) to 1/800 second (in the ISO 2500 image), which is a lifesaver when you don't have a tripod!
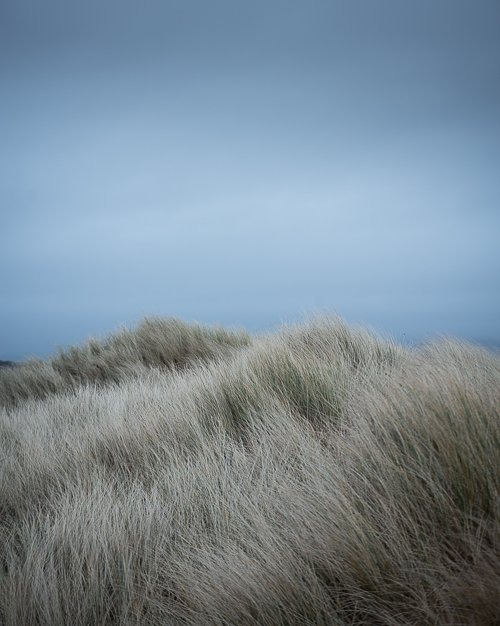
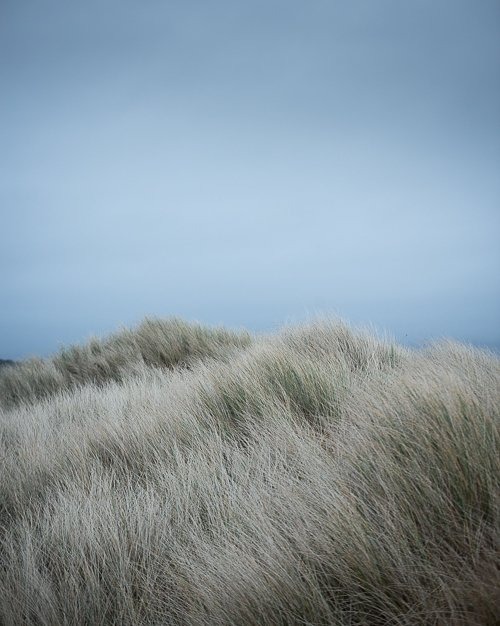
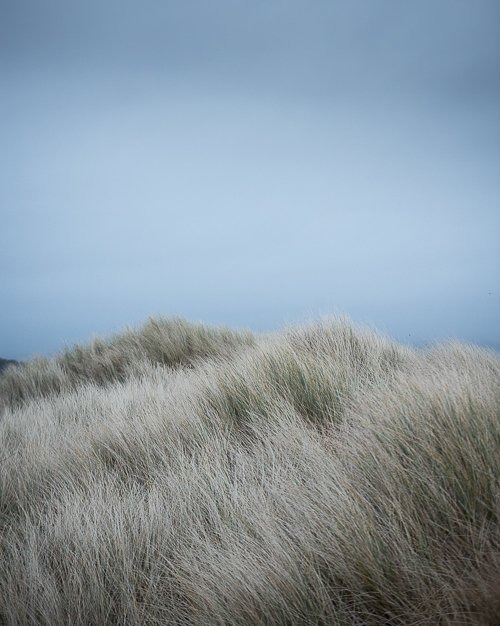
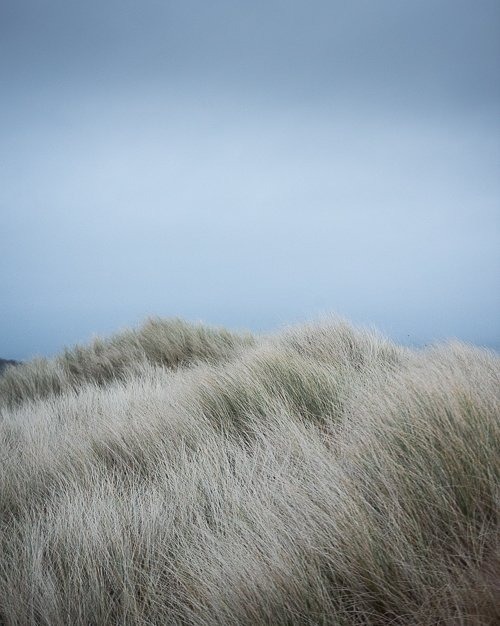
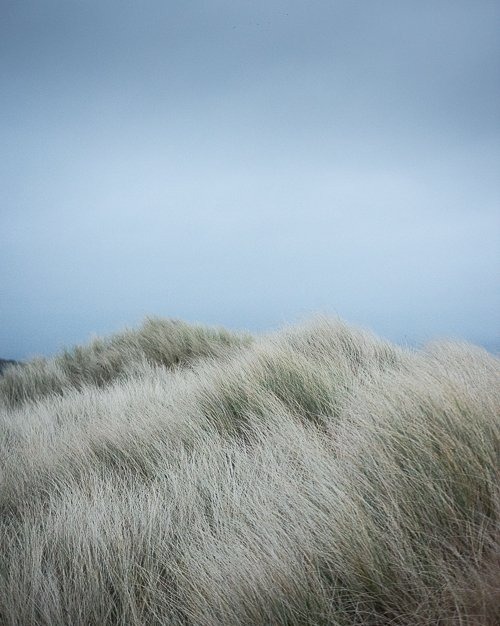
If, for any reason, you can't use a tripod then increasing the ISO to get a usable image is far preferable to missing the shot or getting a blurry photograph. Digital sensor technology is improving all the time, and with it the high ISO capabilities of the cameras are getting better and better.
It wasn't so long ago that using an ISO of 200 would introduce a ton of noise, but now the difference between ISO 100 and 200 is barely noticeable. With my D800, which is a six year old camera model, I can shoot usable images up to about ISO 2,400, so you definitely shouldn't be afraid to ramp up the ISO if you need to. This is a necessity in fields such as astrophotography as well.
Depth of Field and Aperture
The next point in the Exposure Triangle is the aperture, and while the ISO's secondary effect is to increase digital noise the aperture effects the depth of field in an image. As explained here, the depth of field refers to the amount of the image that is in focus. This can have a dramatic effect on the final image.
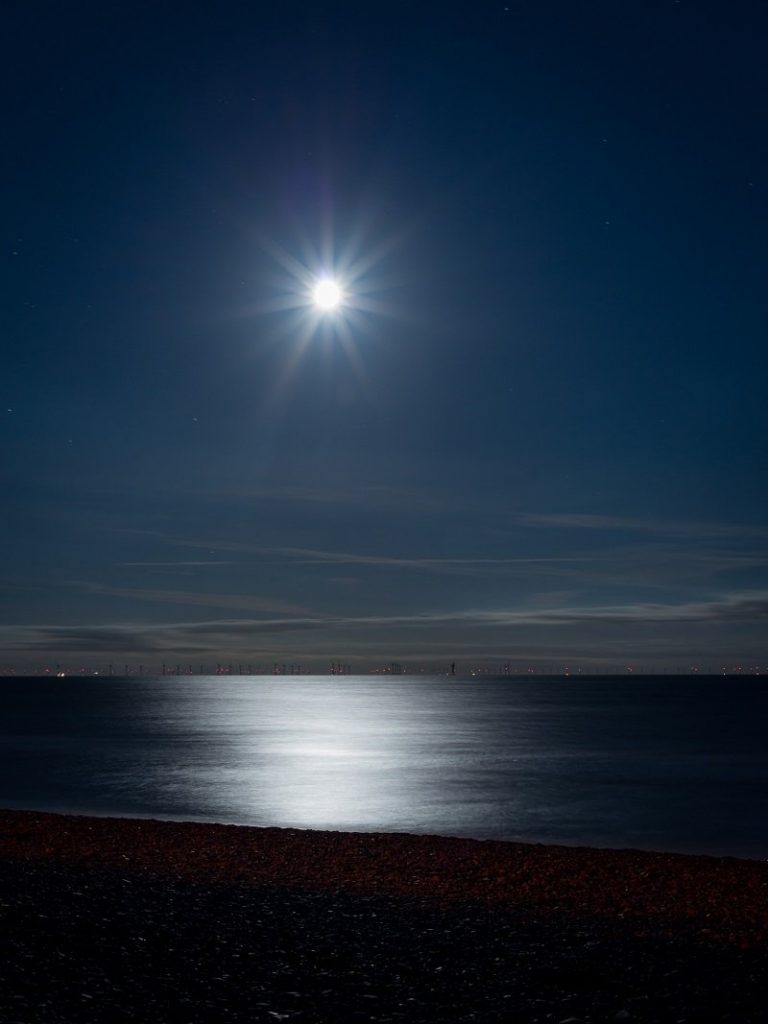
Using the aperture setting creatively can yield all sorts of interesting effects, such as this 'moonburst' created by using a narrow aperture.
The depth of field is effected by a variety of factors: The aperture, the focal length of your lens, the distance between your camera and your subject, and the distance between the subject and the background.
- Aperture - This one is simple. The wider the aperture the smaller the depth of field is. A wide aperture is a low f/number, so a setting of f/2.8 has a shallower depth of field than an aperture of f/11. Typically, we'll be working with apertures between f/8 and f/16, but there are occasions when we actually want a shallow depth of field.
- Focal Length - The focal length refers to the optical zoom on your lens, and the longer the focal length the shallower the depth of field will be. For example, a wide angle lens set at 18mm has a larger depth of field than a telephoto lens at 200mm.
- Subject Distance - The distance between our lens and the subject we're focusing on has an impact on depth of field as well. The closer the subject is, the shallow the depth of field. So if you are focusing on a piece of foreground interest that is very close to the lens your depth of field will decrease, but fortunately this is often balanced by the fact you're using a wide-angle lens. This is the reason that macro photography has such a shallow depth of field.
All of these factors combine to determine the overall depth of field in an image, which you can then increase or decrease by changing the aperture, focal length, or distance to your subject. Generally speaking, the typical landscape photographs you see have a large depth of field to keep everything from front to back sharp, but it's not a steadfast rule and there are situations where a shallow depth of field is actually preferable.
When and How to Use a Large Depth of Field in Landscape Photography
The majority of landscape photographs you'll have seen are likely to be grand vistas of beautiful locations, with interesting foreground material stretching off to a gorgeous background. This is when a large depth of field is preferred, because we ideally want everything from the important foreground subject all the way to the horizon tack sharp.
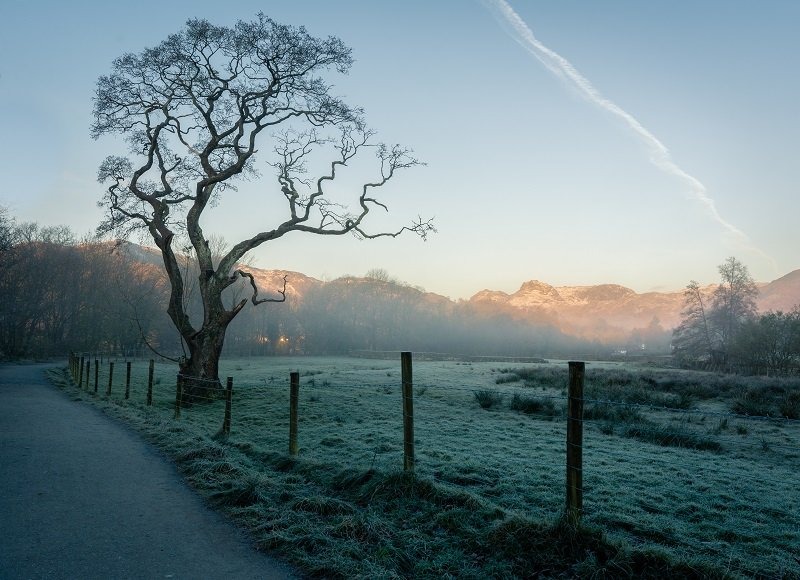
Fortunately this is quite a simple situation to prepare for, especially if you're using a tripod and aren't constrained by shutter speed. Here's how to achieve a large depth of field:
Fortunately this is quite a simple situation to prepare for, especially if you're using a tripod and aren't constrained by shutter speed. Here's how to achieve a large depth of field:
- Narrow Aperture - Use a narrow aperture to increase depth of field, but don't push it too far because you risk introducing diffraction and compromising your image quality. A range between f/8 and f/16 is usually a good rule of thumb.
- Wide Angle Lens - The shorter your focal length, the larger depth of field you will have. A wide-angle lens is often used for these grand vista photographs, which is perfect for maximising the depth of field.
Make sure to check out this awesome resource from Light Stalking too, which is full of useful articles for getting to grips with camera settings and the wider world of landscape photography.
When and How to Use a Shallow Depth of Field in Landscape Photography
Almost all the guides I've seen online recommend using a large depth of field to ensure everything remains tack sharp, but in doing so you will miss out on a lot of opportunities where a shallow depth of field actually enhances the image. These sorts of shots aren't as widespread as the grand vistas of the world, but they are often just as beautiful and offer a little more subtlety to your portfolio.
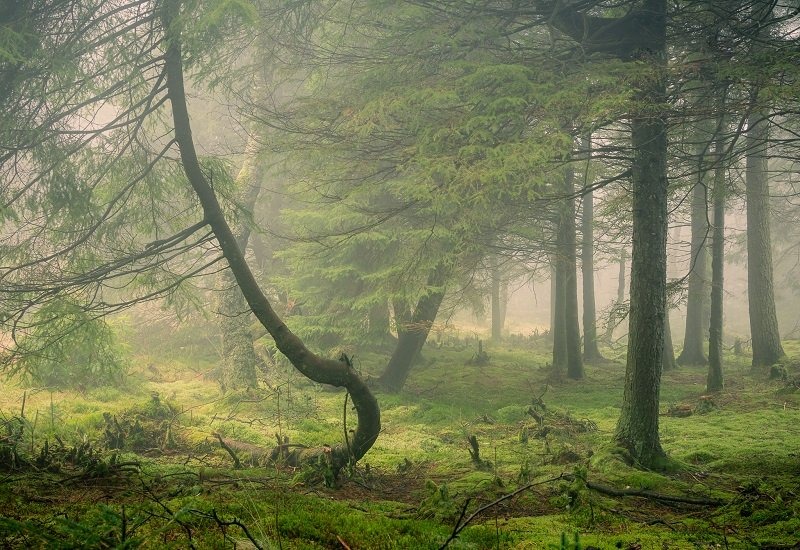
Of course, there are occasions where your hand is forced into using a shallow depth of field. If you can't use a tripod for instance; then you will have to play a balancing act between ISO and Aperture to maintain a usable shutter speed all while not compromising the amount of digital noise or the depth of field too much. Yet another reason to use a tripod!
Occasions where we actually aim for a shallow depth of field are a little more rare, but no less important:
- Mist - Misty conditions are a landscape photographer's dream, and they offer many possibilities for those willing to experiment. Think about what mist does for a second. It obscures visibility, and the reason photographers love it so much is because it adds a sense of mystery to their image. Using a shallow depth of field in misty conditions accentuates the effect of the mist and adds further mystery to the scene.
- Drawing Attention to a Subject - There are certain occasions where the background being sharp simply isn't important and we can allow it to drop out of focus a bit. These tend to be images with one main star of the show, and by using a shallow depth of field and focusing just on that subject we can draw further attention to that subject. This works especially well with interesting trees or animals.
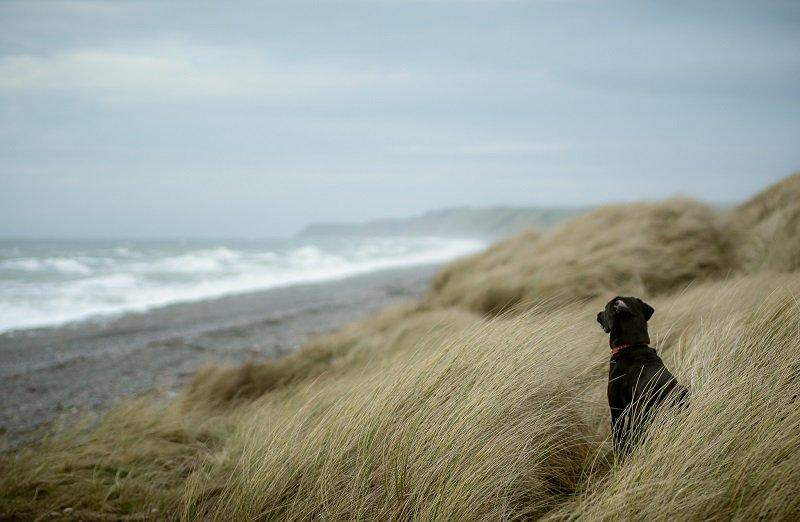
The settings for this type of landscape photography can vary wildly, largely depending on whether you have a tripod and just how out of focus you want the background to be. Here are a few pointers:
- Wider Aperture - Depending on what lens you have you might be able to go all the way to f/1.4, rendering most of the image completely out of focus. Start by experimenting with apertures at f/5.6 and below to see what effect it has on your images.
- Longer Focal Length - This depends on whether your composition will allow it, but stepping back and using a longer focal length will inherently decrease the depth of field, so whilst f/5.6 on an 18mm lens will have quite a lot of the image in focus the same aperture on a 300mm lens will only have a small sliver of focus.
A Word on Focus Stacking in Landscape Photography
Sometimes conditions and lenses conspire against us. It's unavoidable, but it's important to know that their are ways to overcome these difficulties. Focus stacking is one of them.
Some compositions are just impossible to get fully sharp. The subject might be too close to the lens, the focal length might be too long, or the light levels might require a very wide aperture. When you want a large depth of field in these situations it can be frustrating, but it's actually fairly easy to solve this problem.
Firstly, you could spend a fortune on a specialist tilt-shift lens, which requires a lot of skill to use and allows you to alter the actual plane of focus to get everything perfectly sharp.
Alternatively, you can use a method called focus stacking. Mount your camera on a tripod, and then take three separate images of your composition - One focusing on the foreground, another focusing on the middle ground, and another focusing on the background.
Between these three images you have the entire scene in perfect focus. Now all you need to do is blend them together into one, perfectly sharp photograph. For this you will need Adobe Photoshop.
- Open the three images as separate layers in Photoshop.
- Select all layers and go to Edit > Auto-Align to get the images perfectly aligned in case of any tripod movement during the capture.
- Keeping all layers selected, go to Edit > Auto-Blend Layers and then choose the 'Stack Images' option. Click OK and you're done!
Photoshop then selects the sharpest parts of each image and applies a mask to the out of focus areas, blending the three images into one seamless photo with everything in focus.
Shutter Speed and Experimenting in Landscape Photography
The final point of the Exposure Triangle is the Shutter Speed, which is simply the speed at which the shutter opens and closes. The longer it's open, the more light is allowed to reach the sensor and therefore the brighter the final image will be. It sounds simple, but it actually opens up a world of possibilities for those landscape photographers willing to experiment a bit.
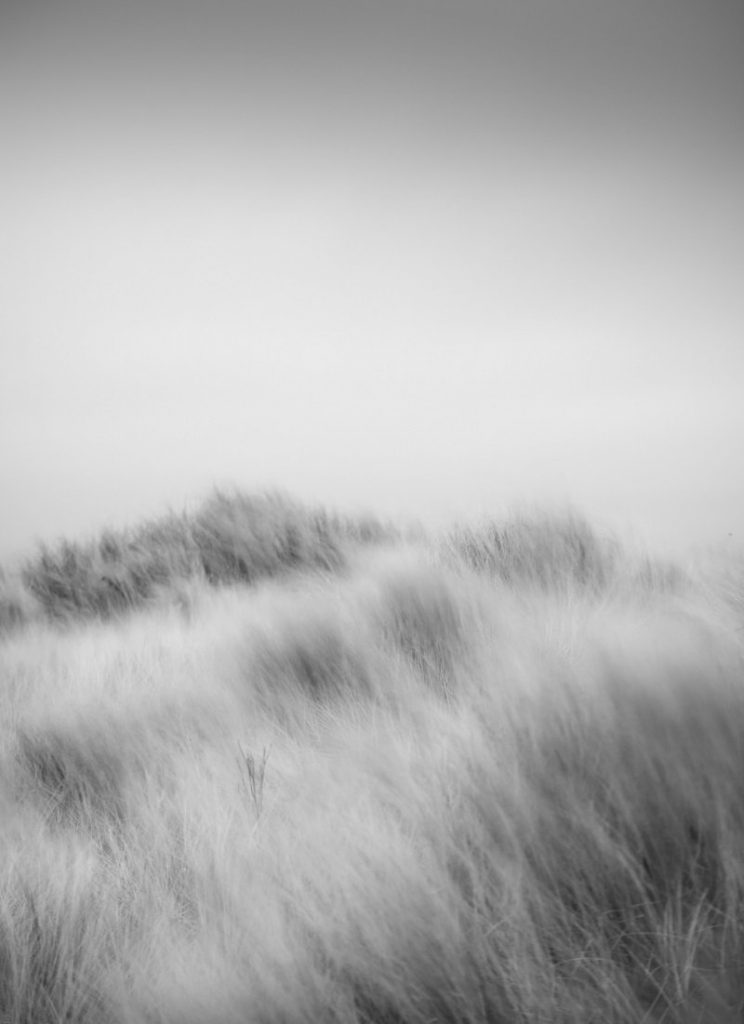
It's worth reiterating that the Exposure Triangle is all a balancing act, so if you want a longer shutter speed all you have to do is either decrease the ISO or make the aperture narrower. The reverse applies if you want a shorter shutter speed.
To Handhold or Not to Handhold - That is the (first) Question
Before your start thinking about using shutter speed creatively the first question you need to think about is whether you're using a tripod or not. I recommend using one, but if for any reason you can't your options become a bit more limited due to the threat of camera shake.
If your shutter speed is too long while hand holding the camera it will introduce camera shake, resulting in blurry images. The general rule is that you want a shutter speed of 1/focal length or faster. For example, if you're using a 50mm focal length you ideally want your shutter speed to be 1/50 second at the very least to avoid a blurry outcome.
If, however, you do happen to have a sturdy tripod with you the options get considerably broader…
Bracketing in Landscape Photography
Some natural scenes are simply too high in contrast to capture in a single image. In these situations you have a number of choices. You can use a graduated neutral density filter to balance the contrast in camera, you can just deal with it and end up with an image with underexposed or overexposed sections, or you can use my preferred method and bracket.
Bracketing is the term used for taking multiple photographs of the same composition, each with a different level of exposure. This allows the entire dynamic range of the scene to be captured, and then blended together later in post-processing.
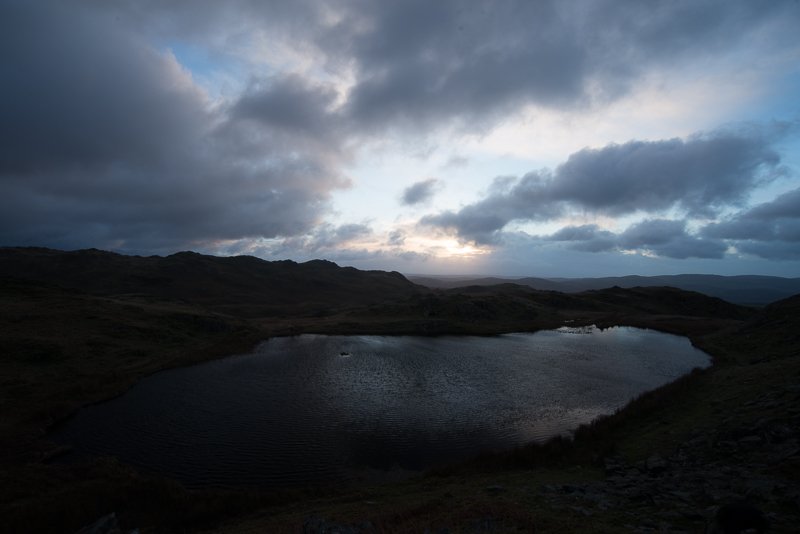
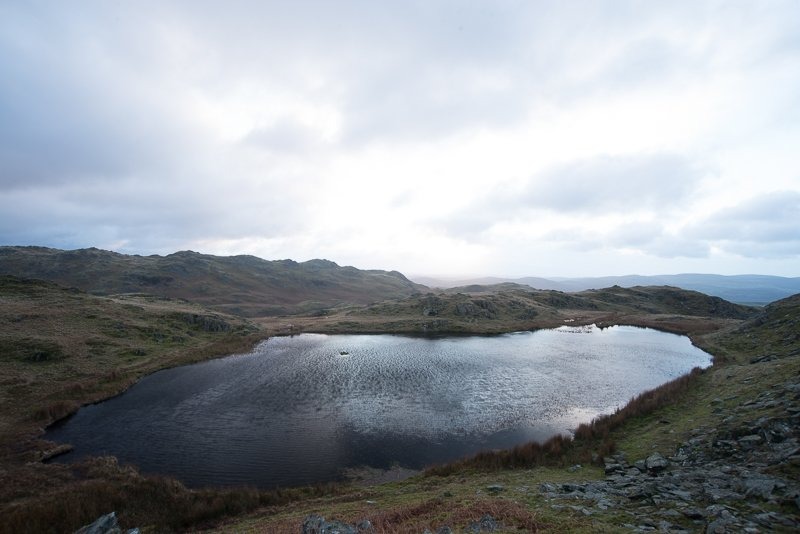
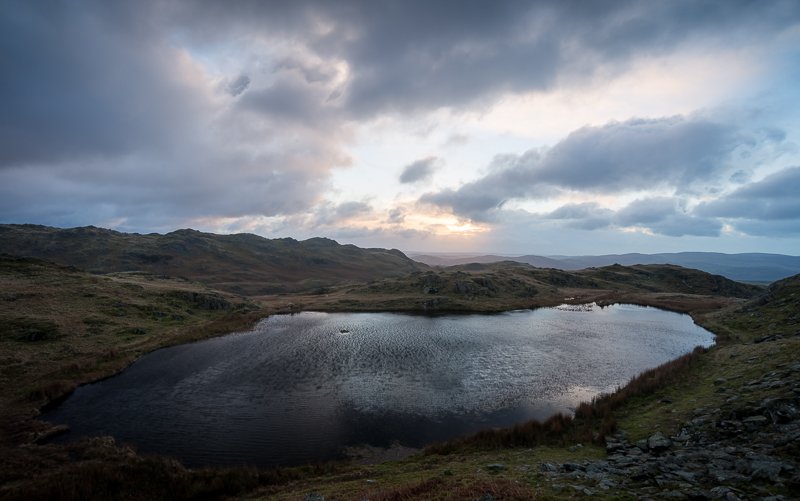
Three images is usually enough, and it's very simple to execute. A lot of DSLRs nowadays have their own dedicated bracketing setting, but if yours doesn't it's really no huge loss.
All you need to do is have the camera mounted on a tripod and take three consecutive images, changing the shutter speed between each one. One photo at the correct exposure, another underexposed, and another overexposed.
Once you've captured the images study the histogram for each one and make sure that the underexposed one hasn't blown out any of the highlights and the overexposed one hasn't clipped the shadows. After that all that's left to do is import the images into Adobe Lightroom (my preferred post-processing software), select all of them, and right click > Merge As HDR.
The outcome will be a single RAW image with the entire dynamic range of the scene available to you. I much prefer this to carrying around Graduated ND Filters.
Using Shutter Speed Creatively in Landscape Photography
For many photographers the need to ensure a fast shutter speed is an annoyance. For landscape photographers though, the possibilities offered by slower shutter speeds is godsend!
This is because the camera sensor is recording movement all the time that shutter is open. This means that any moving elements in your scene can be blurred by using a longer exposure time, which can result in ethereal and beautiful landscape photographs. But knowing when this technique is effective is important.
When to Use a Long Exposure in Landscape Photography
- When you have a tripod available to stabilise the camera.
- When the light level is low enough (or you have ND Filters) to allow for a longer shutter speed without overexposing the image.
- When you want to record the movement within the scene.
The most commonly seen examples of long exposure images tend to include a moving water source, whether it is a lake, river, or ocean. This is because the movement of the water either blurs into an ethereal mist (during a very long exposure) or portrays some aesthetically pleasing sense of movement with shorter exposure times. We'll discuss how best to approach this below.
Clouds are also a good subject for long exposure photography, as you can render those fluffy white cumulus clouds as streaks in the blue sky by leaving the shutter open for longer. You can also experiment with people, animals, and vegetation to create more abstract landscape images.
How to Use a Long Exposure in Landscape Photography
This is as simple as following the rules of the Exposure Triangle. If you want a longer shutter speed than your camera's meter suggests you need to reduce the amount light getting to the sensor. This can be achieved by closing down the aperture, decreasing the ISO, waiting until it's darker, or using neutral density filters.
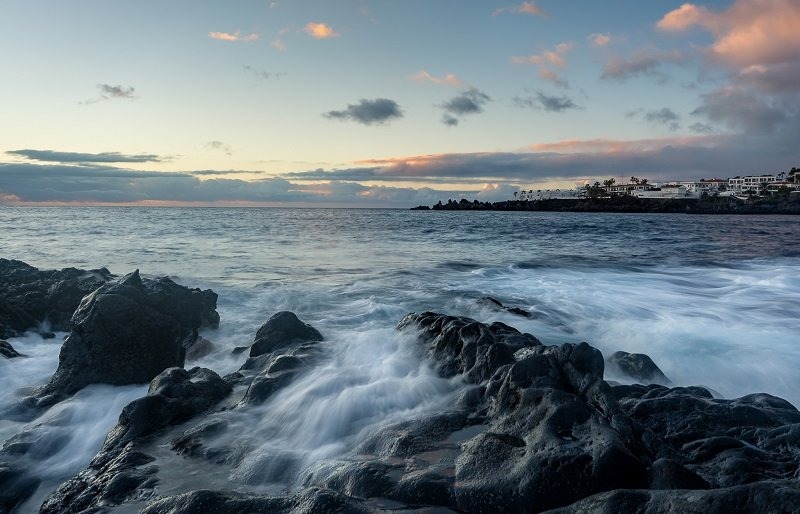
Using this technique in the field does require a bit of trial and error though. Far too many landscape photographers simply slap a 10-stop ND Filter on their lens and go for ultra-long exposures every time, but this isn't always the best move. Some subjects work better with slightly lower exposure times, and by constantly churning out cliche images of milky smooth water you can become quite predictable. It's best to mix it up a bit.
For example, seascapes often lend themselves to shorter shutter speeds. This helps to capture the movement and drama of the waves, but depending on the strength and speed of those waves the ideal exposure time can vary. This is where the experimentation comes into play. Here is how I would set up for a seascape photograph:
- Find a composition I like and mount camera to tripod.
- Start with the longest exposure time that the light will allow.
- Work my way down to shorter exposure times and determine the ideal exposure length for that particular shot.
- Using this shutter speed, experiment with releasing the shutter at different times in the wave cycle (retreating, advancing, breaking etc.)
- Experiment some more and have fun!
Honestly, that's all there is to it really. Subjects like water, clouds, and trees can look fantastically surreal in a long exposure, but it's down to the specific conditions, composition, and your own preferences to determine exactly how long you want the exposure to be.
I suggest you get out there and experiment with different shutter speeds and subjects and discover what you like in an image, and then you can work from there.
Conclusion
Two parts down, some more to come! By now you're well on your way to getting some beautiful and creative landscape photographs, backed up by the right gear and knowing which settings to use and when. Now it's a case of getting out there and practising what you've learned, eagerly anticipating part three of our Ultimate Guide to Landscape Photography.
Make sure to subscribe to our email newsletterto stay up to date with all the latest photography guides, tutorials, and news from Click and Learn Photography.
If you liked this piece of content please consider sharing it with your friends or leaving a comment below.
Read More…
Best Cameras for Landscape Photography
Best Lenses for Landscape Photography
A Beginner's Guide to Astrophotography
Using Leading Lines to Improve your Composition
 |
 |
 |
 |

About Alex W.
Alex is the owner and lead writer for Click and Learn Photography. An avid landscape, equine, and pet photographer living and working in the beautiful Lake District, UK, Alex has had his work featured in a number of high profile publications, including the Take a View Landscape Photographer of the Year, Outdoor Photographer of the Year, and Amateur Photographer Magazine.
Thoughts on "The Ultimate Guide to Landscape Photography Part 2 – Camera Settings"
 |
 |
 |
 |
You can Get FREE Gifts. Furthermore, Free Items here. Disable Ad Blocker to receive them all.
Once done, hit anything below
 |
 |
 |
 |