Leading Lines – How Can They Improve Your Photography Composition?
by Alex W.
As you might have guessed from me tearing up the photography rulebook, I’m not exactly a stickler when it comes to rules. This is especially true when the rules try to control such a subjective and creative activity as photography.
However, I do freely admit that many of these ‘rules’ come from a genuine place and can be very helpful. In fact, the only thing I disagree with is that some people have decided that they are rules that must be abided by at all times. I prefer to think of them as ideas, and the idea of leading lines is a fantastic one for improving your composition.
Leading lines can add interest and depth to an image, and using them sometimes goes a long way towards transporting your viewer into your photograph and world.
But how can we use leading lines in this way, and for the uninitiated readers what are leading lines?
You Might Like… Beginner’s Guide to Photography Composition
What are Leading Lines?
The concept of leading lines is a well known one among photographers, and is often touted as one of the major rules of composition for beginner landscape photographers.
The idea is simple – We use elements within our composition that guide the viewer’s eye into the image and towards our main subject of interest.
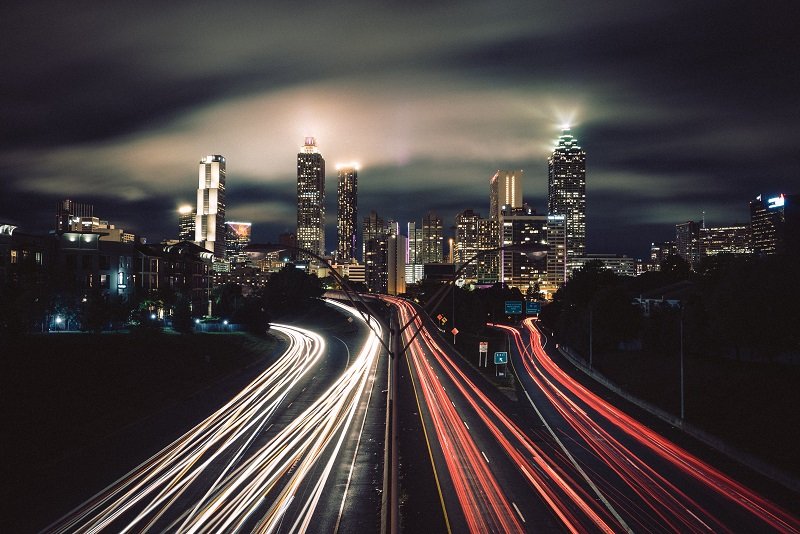
Notice how the eye is drawn to the skyscrapers in the distance, following the lines created by the light trails from passing cars.
This guiding of the eye into our image enhances the sense of depth, which is very important when we’re trying to convey a three-dimensional world on a two-dimensional medium. People’s eyes will naturally follow these lines, so we can use them to point towards what we want the viewer to notice.
To put it more simply, leading lines basically create an easy path for the eye to follow into our image, and with careful use we can make that path go anywhere we want!
Simple, right?
We can get very clever with our use of this tool though, and that’s what we’ll discuss here.
You Might Like… The Ultimate Guide to Landscape Photography Pt I
What can we use as Leading Lines?
Honestly, the only limit here is your imagination! There are some obvious and usually man-made elements that will instantly pop into your head, such as roads and walls and fences. These all make great leading lines, but the fun doesn’t have to stop there.
We can also use natural objects such as tree trunks, rivers, and shorelines as leading lines. But the fun doesn’t even have to stop there – We can even leave the realm of the physical behind and step into a world of implied leading lines. Generally speaking, an implied leading line such as a well placed ray of sunlight is a much more subtle leading line than an in-your-face railway track.
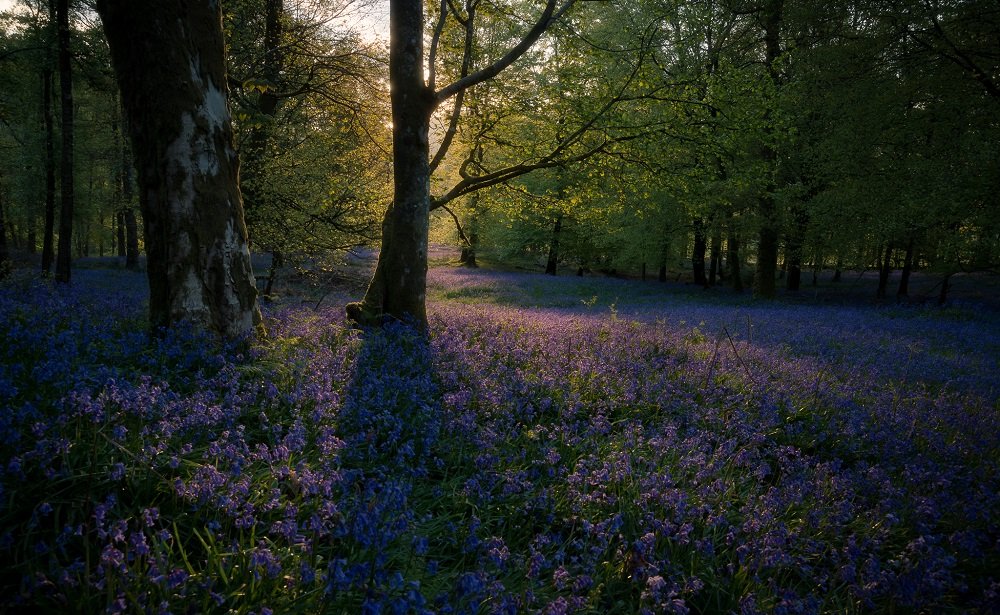
Leading lines don’t have to be railway tracks or roads – They can be as subtle as the way a shadow falls on the ground to create a difference in tonality.
The only rule is that they should lead the eye somewhere, and your job as a photographer is to make sure they lead the eye to where you want it to go.
Here are some more examples:
Physical Leading Lines
- Roads
- Railway tracks
- Rivers
- Fences
- Bridges
- Piers / Jetties
- Tree line
- Shoreline
- Fallen tree trunk
- Paths
- Cliffs
- Walls
- Rows of lamp posts / streetlights / doorways
Implied Leading Lines
- Shadows
- Sun rays
- Direction of vision
- Direction of movement
- Negative space
- Cloud formations
- Waves
Using Leading Lines in your Photography
We’ve already touched on how leading lines can be used in your photography, but let’s delve a little deeper into their placement, orientation, and the wonderful phenomenon of converging lines:
You Might Like… 5 must buy lenses for your Nikon
Placement of Leading Lines
Where you actually place your leading lines in your composition can have a huge impact on your final image. A poorly positioned one can unbalance the whole composition, or turn a potentially subtle pathway for the eye into a major distraction. Not to mention that fact that they can, at times, actually lead the viewer out of the image instead of into it.
Unless you’re trying to create a sense of uneasiness and tension, I would recommend placing your leading lines so they point the way towards your main subject.
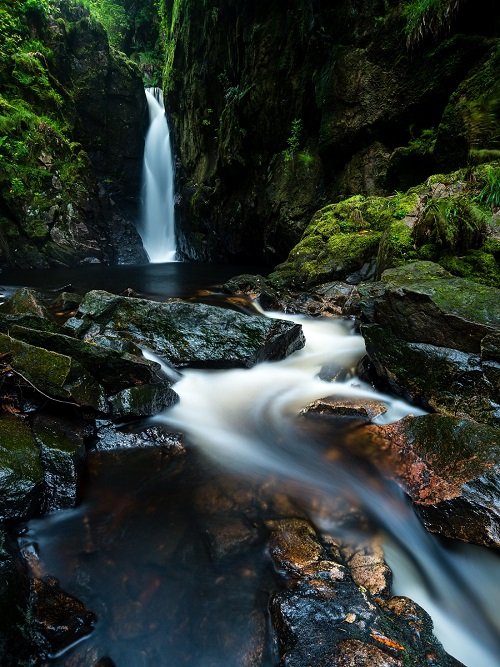
Leading lines often work very effectively when they begin from the bottom corner of your frame.
Often they work very well coming from the bottom corners of the frame, although I encourage you to experiment with placement and find what works best for your particular image. That being said, I generally start by having them coming in from the bottom corners and then consider how that might be improved.
Except when I’m working with converging lines, which is a subject we’ll talk about a little later.
Perspective and Height
It’s not just placement that has a big impact on how effective your leading lines will be – The perspective and the height of your camera can also play a huge part.
Next time you’re out shooting I’d like you to do a little experiment – Shoot the exact same composition from three different heights; One from eye-level, one at about waist level, and one down at knee/shin level.
The two images below were taken on the same morning from almost exactly the same spot, but with the tripod set higher in one of them. Notice how the higher perspective reveals more of the concrete jetty used as a leading line, also preserving the middle ground slightly.
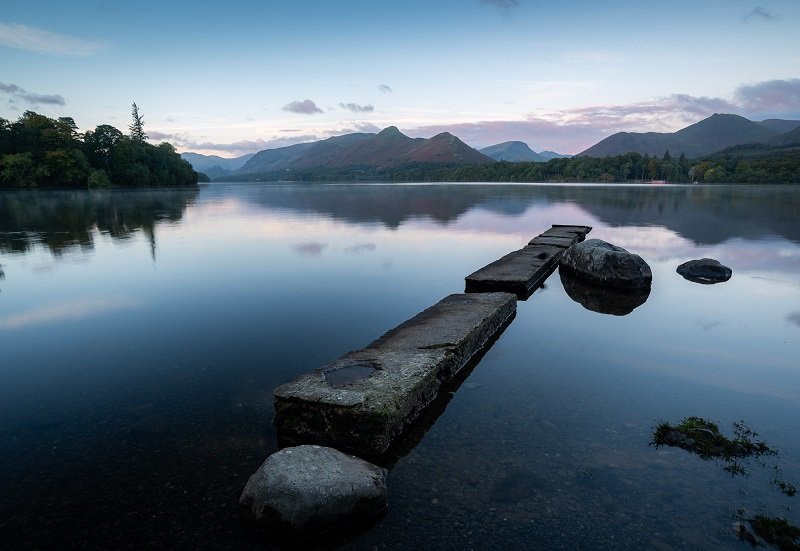
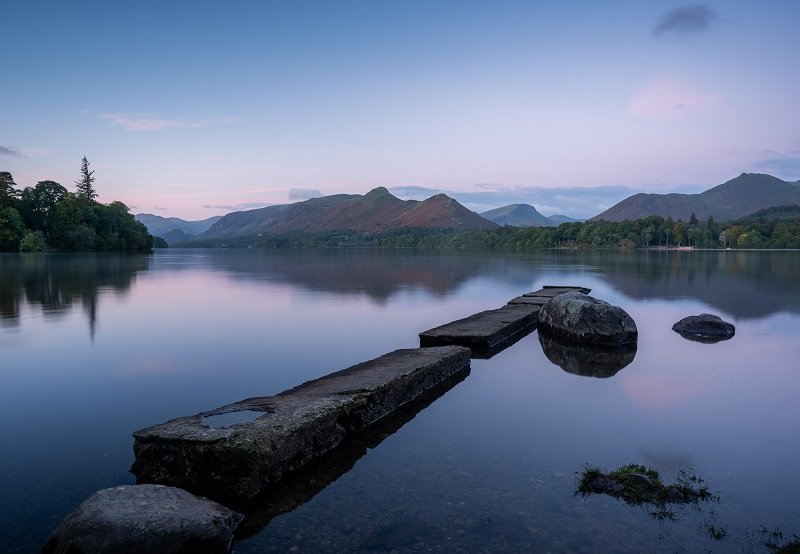
If you’re working with a foreground element or a leading line, the height at which you take the photo can alter the overall perspective radically. Too low and you might block out a nice middle-ground subject, but too high and you could lose all the drama and scale of your foreground element.
Again, this is all dependant on each individual composition, but remember to always consider how a different perspective might improve your photo!
Converging Lines
If you haven’t heard of the term before don’t worry, it’s not as complicated as it sounds. Converging lines are simply when two parallel lines appear to move closer to one another, eventually converging to a single point.
Without getting run over, stand in the middle of a straight road or railway track and notice how the two sides of the road/track appear to get closer to each other. These are converging lines, and they can be a very powerful tool in photography.
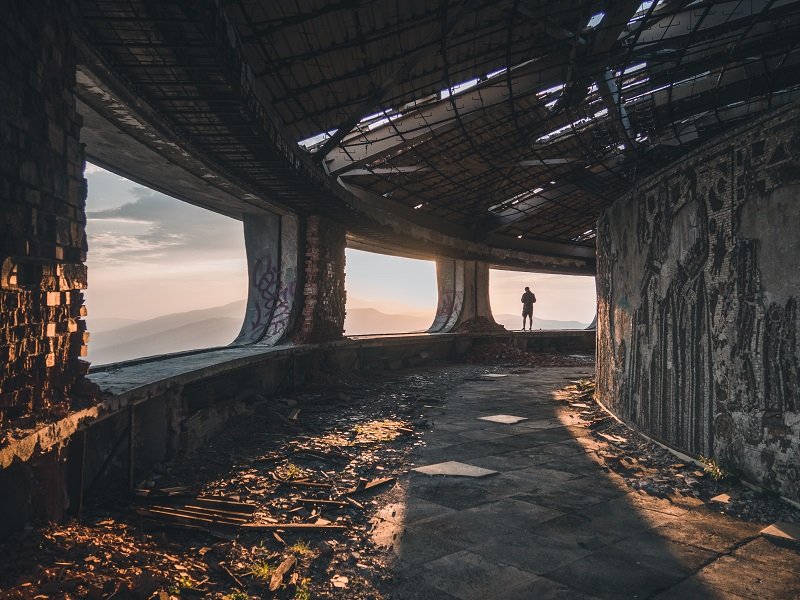
The sides of this curving pathway are converging, drawing the eye towards the lone figure that is the main subject and greatly enhancing the sense of depth to the image.
Converging lines add a huge sense of depth to an image and work perfectly to draw the viewers eye straight into the photograph. Add some converging lines into a composition and it’s almost impossible to stop your eyes following those lines to the single point of convergence. Around that point of convergence is where you want to place one of your subjects – Right in the centre of attention.
Using converging lines is much the same as any other leading lines, although there are a couple of techniques that I like to try out:
- Try using a really wide-angle lens. The perspective distortion can really accentuate the converging lines, making them appear distant and wide in the foreground before rapidly converging.
- Try placing each side of your converging lines an equal distance from the edges of your frame. The result should be a convergence point right in the centre (horizontally) of your frame. This is one of the many times you should consider breaking the ‘rule’ of thirds.
You Might Like… The Best Lenses for Landscape Photography
Converging lines aren’t limited to roads and railway tracks either – You can find them in piers, bridges, jetties, hedgerows, fences, tree plantations and many other places. Keep your eye out!
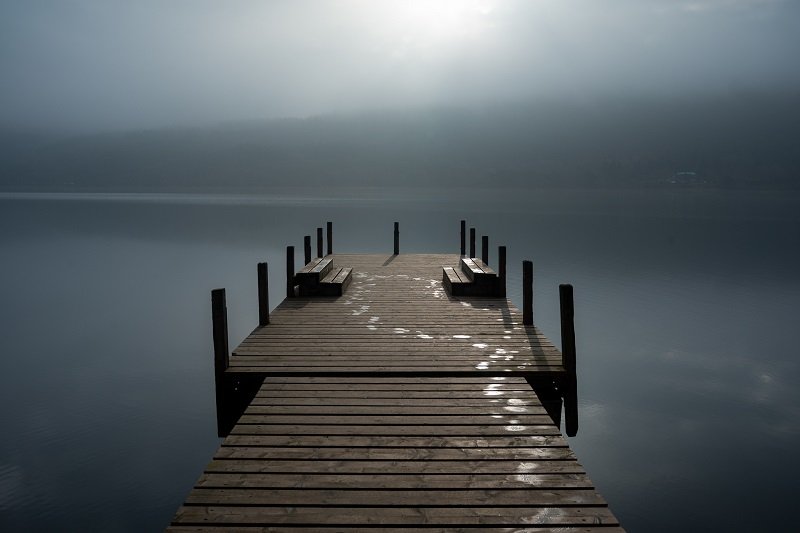
Converging lines don’t have to go all the way to a single point – Just having two lines drawing closer to one another works very well.
More Tips for Using Leading Lines
- Don’t just focus on the physical – Aspects such as light and shade, sunrays, direction of vision (the direction that somebody or something is looking) and direction of movement can all be used as subtle leading lines.
- It’s not just a landscape photography technique – It may seem like it, but leading lines can be used in all genres of photography. Street and wildlife photography are particularly good examples, but using the direction that people are looking to point your viewer towards your main portrait subject is a great way to use them.
- Always think about where your leading lines are actually leading the viewer.
- Experiment with using your leading lines to direct the viewer towards the edge of the photography to create a feeling of uneasiness and tension.
- Capturing receding waves with a relatively long exposure is a great way to create leading lines that almost seem to suck the viewer into the image.
- Consider how the use of straight, curved, and zig-zagging leading lines effect the overall mood of your images. Is a sharp, zig-zagging line really suitable for that serene lake scene, or would an elegant curve work better?

Leading lines aren’t just the domain of the landscape photographer – They’re everywhere in cities and towns!
Read More…
Cityscape Photography – 11 Tips to Take Your Cityscape Shooting Up a Level
10 Must Buy Lenses for your Fujifilm X Series
11 Best External Hard Drives for Photographers
 |
 |
 |
 |

About Alex W.
Alex is the owner and lead writer for Click and Learn Photography. An avid landscape, equine, and pet photographer living and working in the beautiful Lake District, UK, Alex has had his work featured in a number of high profile publications, including the Take a View Landscape Photographer of the Year, Outdoor Photographer of the Year, and Amateur Photographer Magazine.
Thoughts on "Leading Lines – How Can They Improve Your Photography Composition?"
 |
 |
 |
 |
You can Get FREE Gifts. Furthermore, Free Items here. Disable Ad Blocker to receive them all.
Once done, hit anything below
 |
 |
 |
 |