Ultimate Guide to Forest Photography – Tips and Tricks
by Alex W.
As I’m sure anybody who has ventured out into the forest will testify, forest photography is one of the most difficult genres of photography to get to grips with. The usual ‘rules’ of nature photography don’t seem to apply when under the thick canopy of the woods, and with so much going on it can be very tough to create a compelling image.
But there’s a reason so many photographers continue to head into the forest to shoot. Because it’s hugely rewarding when you finally get a shot. I take a lot of landscape photographs, and of the five I have displayed in my house four of them were taken in the forest.
Overcoming the numerous challenges of forest photography takes a lot of practise and almost as much failure, but if you find yourself struggling to improve try out some of these tips and let us know how you get on!
If you find yourself wanting some guidance back in post-processing, then check out our Forest Photography Lightroom Presets bundle here.
Check out our 150+ page Ultimate Guide to Landscape Photography ebook for more landscape photography tips.
Forest Photography Gear
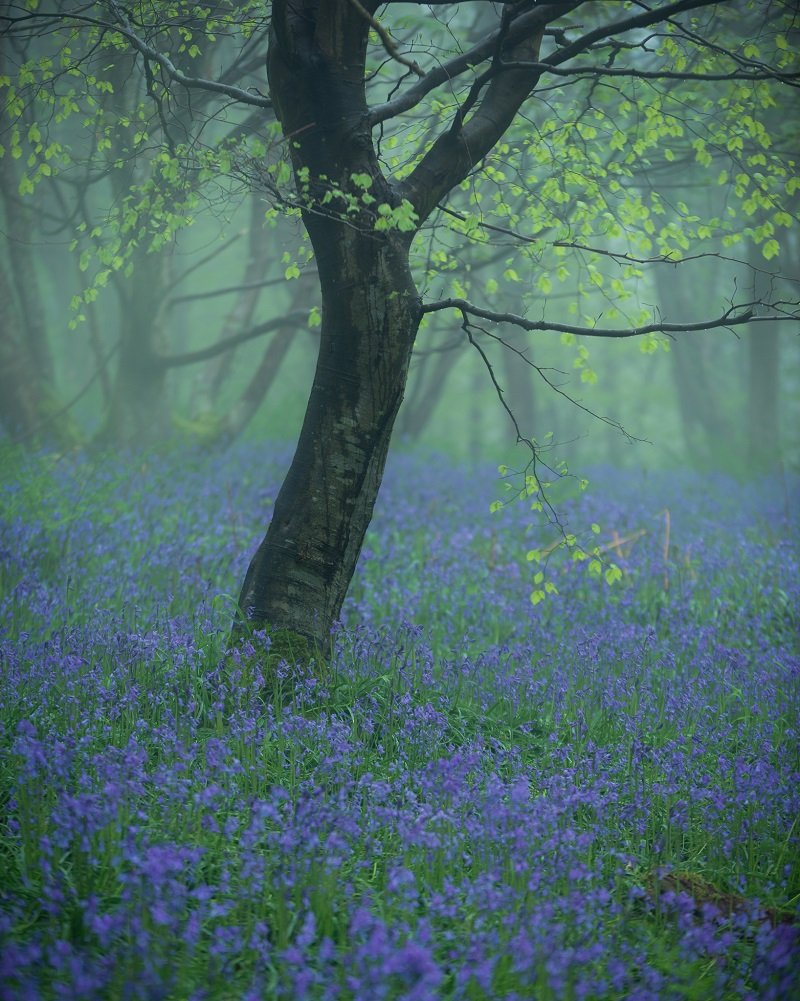
What’s the first thing that pops into your head when you think of landscape photography? My guess would be a wide-angle lens, and while we always recommend considering longer focal lengths this is even more important in forest photography.
We’ll get into why later on in this article, but for now I’ll run through my essential kit list when shooting in woodland:
- Camera Body – Obviously. I use my Nikon D800, but more important is what is attached to it and what’s behind it.
- Wide-Angle Lens – The staple of any landscape photographer’s bag, and one that should be included in your bag on most shoots.
- Telephoto Lens – The wide-angle perspective may be the most popular in regular landscape photography, but in the forest things change. The vast majority of my successful woodland images are taken with a focal length of 50mm or more, and I find the Sigma 70-200mm f/2.8 spends more time attached to my camera than any other lens.
- Macro Lens – This depends on whether you enjoy macro photography or not, but if you do (like me) then the woodland environment offers a world of opportunities for those who like to get up close and personal.
- Tripod – A tripod is recommended for most outings, but in the thick canopy of the forest makes it even more important. Beneath the trees it can be surprisingly dark, even on a bright day, so if you’re looking to avoid camera shake a tripod is a must.
- Circular Polariser – We’ve covered in depth why we adore the circular polarising filter, and that love affair in forest photography. It not only reduces the glare from the often damp vegetation, but it makes the colours of the forest pop and adds some vital colour contrast to a scene.
You Might Like… 6 Reasons to Start Using Prime Lenses
Photographing the Forest
Once you’ve got the gear sorted it’s time to head out to see what you can find. One of the best things about forest photography is the array of conditions that complement it. You’re not just limited to the golden hours of the day like in the more traditional landscape photography, and instead can head out in the middle of an overcast day and still come back with a gorgeous image.
As with every subject though, there are conditions that are more favourable to others. We’ll start with my favourite:
Mist
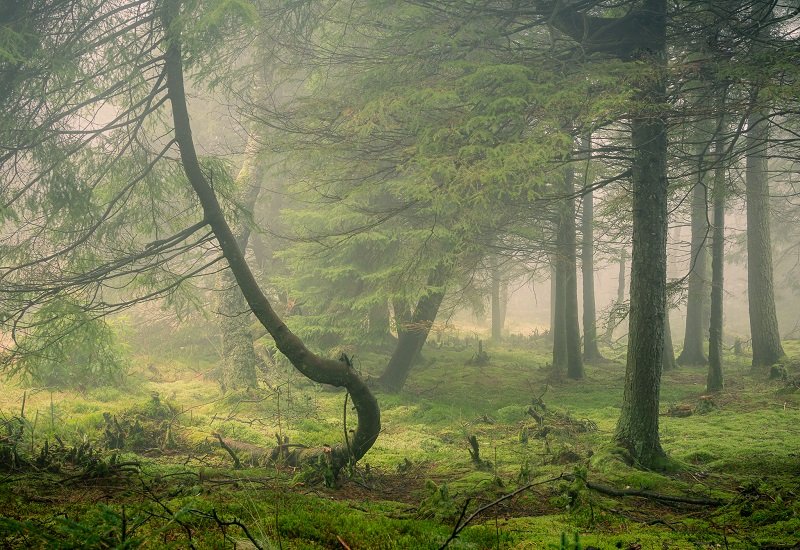
Mist helps to simplify an otherwise chaotic woodland scene into something more manageable and atmospheric.
Mist is a very welcome addition to any landscape image, but when that mist drifts over a patch of woodland it can completely transform the environment. If I predict a misty morning I’ll instantly be tempted to set the alarm early and head into into the trees.
As we’ll discuss later on, the main reason people have trouble with forest photography is because there’s just so much going on. This is an area teeming with life, and wherever there is life there is generally chaos. The chaotic environment wreaks havoc on photographers who are trying to make a thoughtfully composed image, but the arrival of mist changes this.
Mist obscures parts of the forest, helping you to simplify your composition as well as adding heaps of atmosphere into the shot. It doesn’t have to be that gorgeous dawn mist either, low cloud hanging over a more elevated patch of woodland works just as well.
Backlight and Sidelight
Despite what I said earlier, heading out at either end of the day is still the best way to get the most out of forest photography. The lower angle of the sun not only offers gorgeous, warm light, but it also creates beautifully elongated shadows stretching across the forest floor.
To take advantage of these shadows you should search for compositions that provide back lighting or side lighting. Front lighting can take the drama and contrast out of the scene and doesn’t take full advantage of these stretching shadows.
The dynamic range can be an issue, but that’s where the tripod you brought comes into play. Don’t be afraid to bracket your shots and merge them in post processing later on.
Bonus Tip: Combining gorgeous lighting with mist can lead to stunning light beams – An instant winner.
Overcast Days
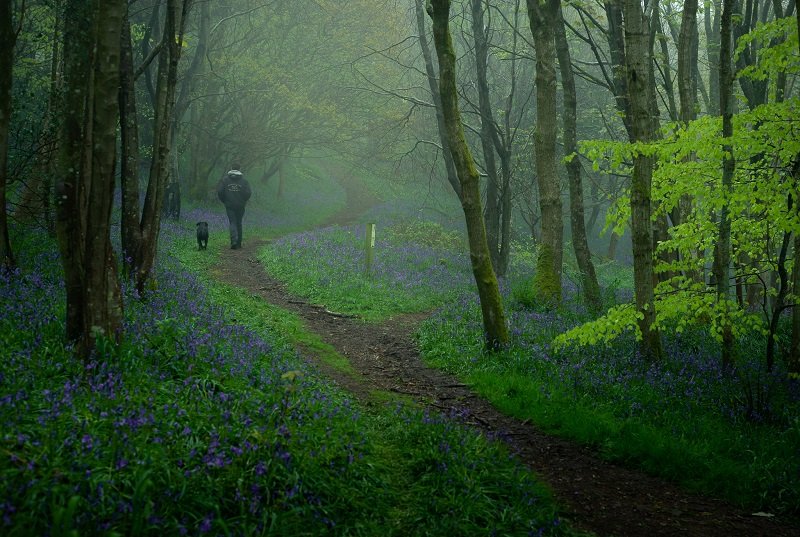
The soft, diffuse lighting on overcast days eliminates distracting highlights in the forest and softens the whole scene.
Many photographers think they’re trapped in a nightmare when they look outside to see an overcast, grey sky. Okay, maybe that’s a bit dramatic, but plenty of them wouldn’t even considering going out to shoot in these conditions.
Fortunately for us, even the dullest of days can work perfectly for forest photography! The clouds, combined with the canopy of the trees, acts as a huge softbox on the landscape. This results in even and soft light, but which still maintains the subtle changes in luminosity caused by the tree cover.
Revisit in Different Seasons
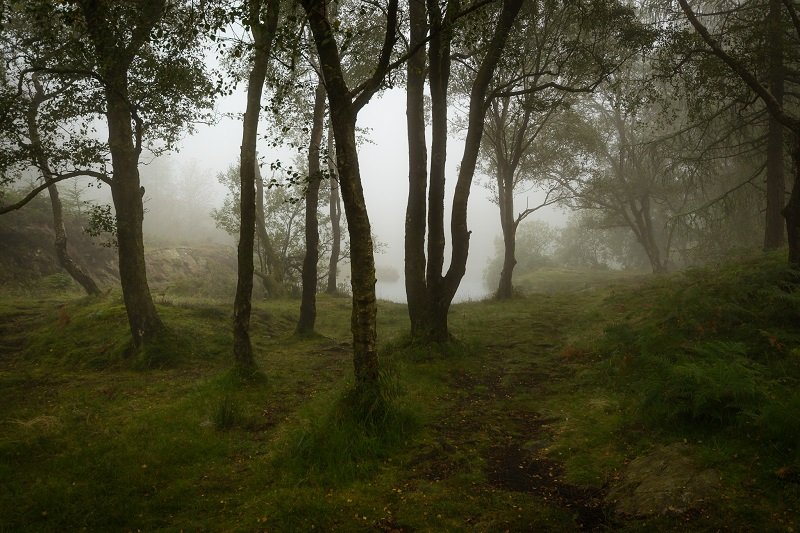
This collection of trees change dramatically throughout the year, and it took multiple visits to find the image that worked for me.
If you have plenty of woodland within short driving distance of you it’s very worthwhile to revisit your favourite locations in different seasons. The seasonal changes of the area are even more pronounced in the forest, and they can be completely transformative in some cases.
Autumn is the obvious changer, with the leaves turning vibrant shades of yellow and red to create a colourful canopy all around you. Spring also offers unique opportunities, such as newly emerging flowers and the bright green of new leaf growth. Summer brings a lush and deep feel to deciduous woodland. Even winter offers a lot of opportunities, such as trying to catch the last hints of autumn or focusing on the skeletal branches of the trees.
I actually have a mental list of all the wooded areas around me, and know which ones work best in which seasons and conditions.
Read More… The Ultimate Guide to Spring Photography
Forest Photography Composition Tips
Find Order Within the Chaos
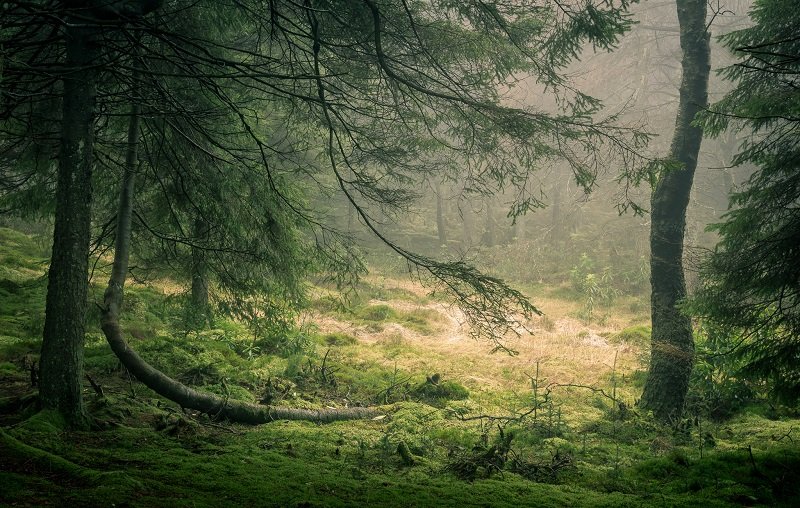
This twisted tree and low hanging branch is a perfect example of finding order within the chaos, and is paramount to forest photography.
Forests are naturally very chaotic environments. They are essentially a hub of nature, boasting an abundance of flora, fauna, and water compared to the surrounding areas. This creates something of a spiral of life, with more animals and vegetation colonising the area and yielding yet more hydration, food, and prey for the other lifeforms in the area.
This is fantastic for nature, but throws up some common problems for photographers. One of my mantras of composition is to simplify the scene, but when surrounding by dozens of sprawling trees this is a lot easier said than done. But we all like a challenge, right?
Only practise will hone this skill, but if you can learn to spot little segments of interest and order within the chaos of the forest your opportunities will open up. You could use a telephoto lens to isolate this order and capture a simplistic image, or you could choose to include the surrounding chaos and bring attention to this small area of order in an otherwise chaotic world.
Bonus Tip – Try and exclude any small patches of sky in your composition. Often the sky will be visible through the gaps between leaves, but the huge different in brightness means these end up as ugly bright flecks of distraction. Try and exclude them if possible.
Use Leading Lines
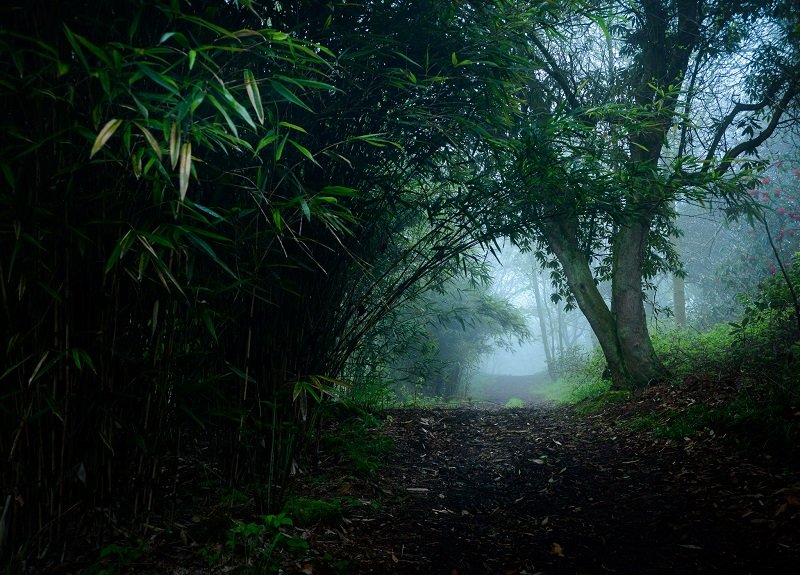
Pathways through the forest offer perfect leading lines to draw the viewer into the image.
Leading lines are one of the most well known compositional tools in photography, and while I don’t recommend relying solely on them it’s undeniable that they often work perfectly in a woodland environment.
You Might Like… Using Leading Lines to Improve Your Photography
Many forests have paths running through them, and when trying to focus a viewer’s attention and transport them into the scene these can work wonderfully. You can use a path through the trees as both the focal point and a leading line, and it often works as to simplify the scene too. If you find one that’s winding off into the distance it’s even better!
It’s not just paths that can be used as leading lines though. If you’re shooting during the golden hour the low angle of the sun can create beautiful elongated shadows of the trees, which work perfectly as leading lines towards your main subject.
Depth is Key
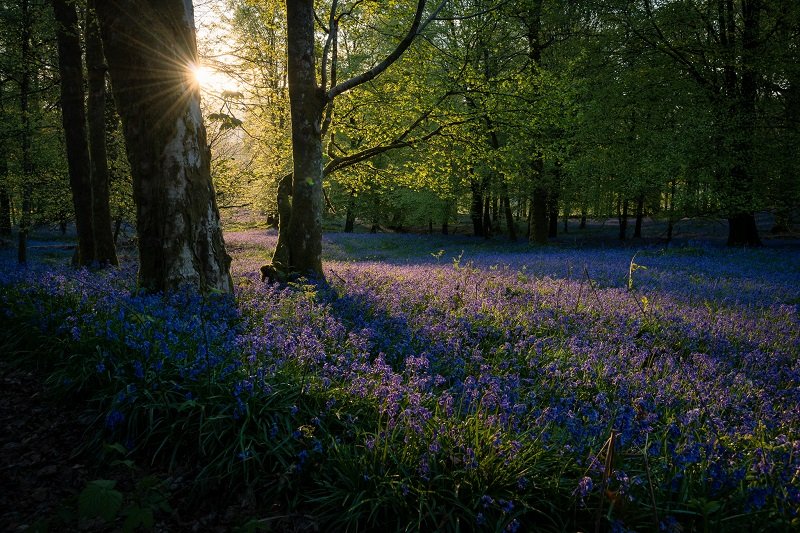
The elongated shadows in the dawn light enhances both the depth and atmosphere of this gorgeous spring morning.
Photography is all about transporting the viewer into the shot and making them feel like they are there themselves. Believe me, it’s a great feeling when somebody makes a comment on your photo saying “It feels like I’m there”.
One of the best ways to do this is to enhance the sense of depth. This is true for all forms of photography, but even more so with forest photography. The jumble of trees and lack of any meaningful focal point can often lead to an image looking rather flat and two-dimensional, which instantly puts you at a disadvantage.
Fortunately, there are a few tricks of the trade we can use. Try a long focal length and wide aperture to throw the background out of focus, or you can use environmental factors such as the long shadows discussed above. Mist is also a fantastic depth enhancer, as well as adding that all important mystique to your shot.
Look for Contrast in Luminosity and Colour
Finding the contrast within a forest is one of the key ways to create a focal point for your images, which is imperative if you want to keep the viewer engaged. Contrast is usually talked about just in terms of the difference between bright and dark, and this indeed is important. If you can find a small patch of woodland illuminated by the sun you can use this to contrast against the dark forest surrounding it. But colour contrast is a very important aspect too.
Colour theory is too complicated to go into in depth here, but fortunately we have a handy tool at our disposal. The colour wheel below displays all the major hues in a wheel, and you can use this when creating a composition.

- Analogous Colours – These are the colours that appear next to one another on the colour wheel, such as greens and yellows. If these are used alongside each other in an image they evoke a sense of harmony and peace. This can be very useful, but in a chaotic woodland environment we want a bit more contrast…
- Complementary Colours – This is where the colour contrast comes into play. Complementary colours are those which are opposite one another on the colour wheel, such as red and green (why do you think a sunset over the sprawling countryside works so well?) These colours complement one another, but also provide a level of contrast that can act as a point of interest for the viewer.
Things can get a lot more complicated than this, such as tricolour complementary colours (think of a red barn in a rapeseed field on a sunny day: Blue, yellow and red) but this level of knowledge will be more than adequate right now.
Finding this colour contrast in the forest can be difficult when you’re largely surrounded by differing shades of green, but it only takes one small area to transform the scene. The purples of flowering bluebells work particularly well with the vibrant green of the new growth on beech trees for instance.
Get Out in the Rain
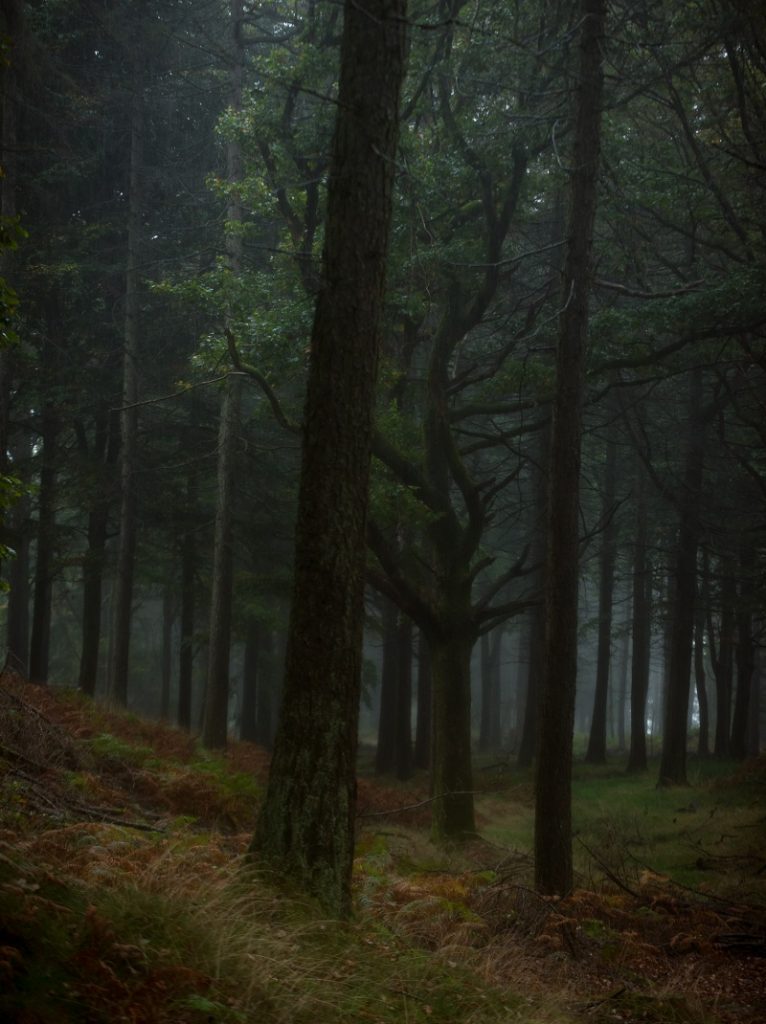
This was taken on one of the wettest mornings I’ve ever been out shooting in, and the rain softened the colours in addition to adding a sense of mystery to the image.
I’m a huge advocate of shooting in the rain, and this extends to forest photography too. Not only are we sheltered from much of the wet weather by the overhanging canopy, but it adds a vibrance to the entire scene. Wet vegetation, when combined with a circular polarising filter, becomes strikingly vivid.
Another benefit of this weather is the atmosphere it can bring to the scene. Whether it’s capturing the driving rain around a tree trunk or using low hanging cloud as makeshift mist, it’s much more preferable to a sunny day in photography terms!
Stop Looking
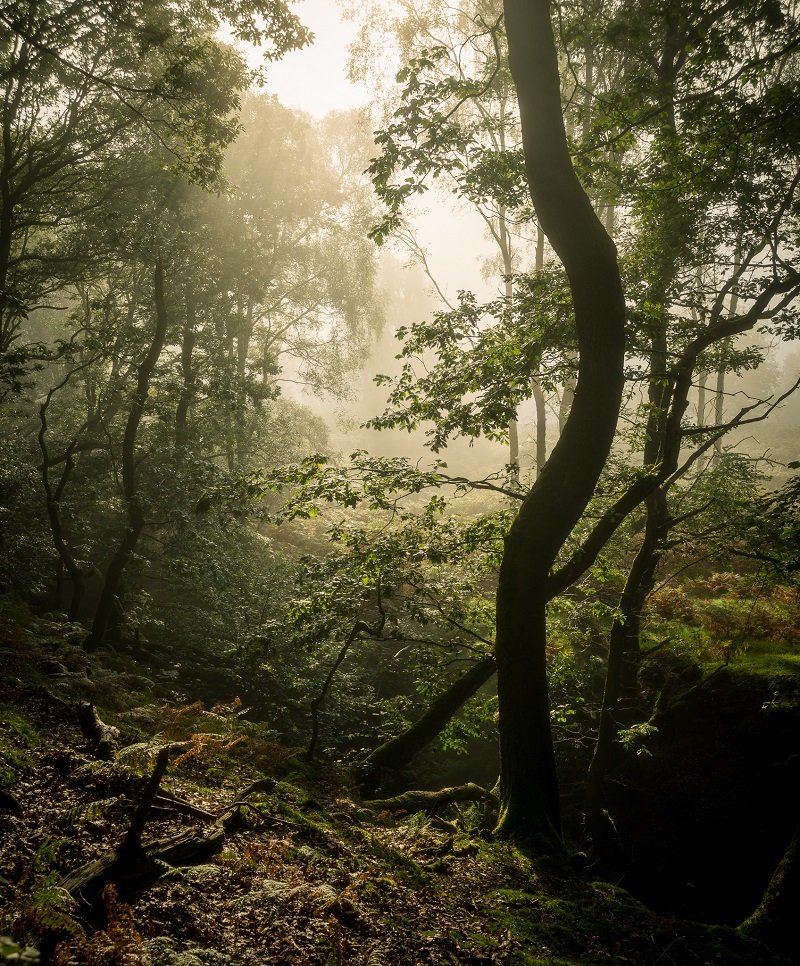
The light burning through the leaves and the hint of mist in the background caught my attention, causing me to stop in my tracks and begin working on a composition.
We’ve saved the best until last. This is my favourite and most commonly used tip for forest photography, and one I still have to remind myself of today.
Simply stop looking for compositions.
Sounds counter-intuitive, right? But believe me, it works. Unless you’re a seasoned woodland photographer (in which case, why are you reading this?) then heading out into the forest and scouring around for compositions will more often than not result in failure. It’s simply too different from the more conventional landscapes, and requires a much more relaxed and laid back approach.
What I do is just go for a walk through the woods with my dog. The camera comes with me, and I just wander and observe until something catches my eye. It’s usually a little flicker of inspiration in my peripheral vision, but if it was interesting enough to catch my eye then it’s probably worth exploring.
Once something has caught my eye I go about working on the composition. I ponder what it was that piqued my interest and focus on that. It could be the light hitting some leaves or the shadows left by some tree branches. Whatever it was becomes my main subject, and I try to work a shot around that.
Sometimes it ends up being nothing image worthy, so I just pack up and continue my pleasant stroll. A few hours doing this and I’m bound to find an image, and it’s very rare that I come back from these walks with nothing to show for it. Even on the rare occasions I haven’t got something I’ve still enjoyed a nice walk in a beautiful setting.
Conclusion
One thing I love about forest photography is that there is very rarely an obvious shot. Think about a standard landscape image from Yosemite or the Isle of Skye and you will probably recall that famous Ansel Adams shot and the view of the Old Man of Storr.
Forest photography isn’t like that – It’s anonymous.
There are shots to be had everywhere, but none of them are iconic viewpoints that have been capture a million times before. None of them are obvious, and very rarely are they recognisable.
That means it’s very possible to capture an unique image, and with the opportunities being so abundant it’s easy to visit the exact same area dozens of times and find something new.
If this guide has piqued your interest in the world of forest photography, don’t forget to check out our Forest Photography Lightroom Presets bundle here.
Read More…
Ultimate Guide to Landscape Photography Pt I
From Capture to Completion – A Beginner’s Guide to Adobe Lightroom
Behind the Lens with Matt Holland
Astrophotography – A Beginner’s Guide to Improving Your Night Photography
 |
 |
 |
 |

About Alex W.
Alex is the owner and lead writer for Click and Learn Photography. An avid landscape, equine, and pet photographer living and working in the beautiful Lake District, UK, Alex has had his work featured in a number of high profile publications, including the Take a View Landscape Photographer of the Year, Outdoor Photographer of the Year, and Amateur Photographer Magazine.
Thoughts on "Ultimate Guide to Forest Photography – Tips and Tricks"
 |
 |
 |
 |
You can Get FREE Gifts. Furthermore, Free Items here. Disable Ad Blocker to receive them all.
Once done, hit anything below
 |
 |
 |
 |